Lab 1: The Artemis Board and Bluetooth
Lab 1A
Pelab
For this all following labs, being able to program the Artemis board and communicate with it with our personal lapton via Bluetooth is vital. To do this, I updated my Arduino IDE and SparkFun Appollo3 boards manager.
Task 1
I connected the Artemis board to my computer using the USB C output on my laptop to connect to the USB C input on the board.
Task 2
To begin programming the board, I burned Blink, from Arduino’s example programs, onto the Artemis board. This caused the blue LED on the board to turn on for one seconds and off for one second, repeatedly.
Task 3
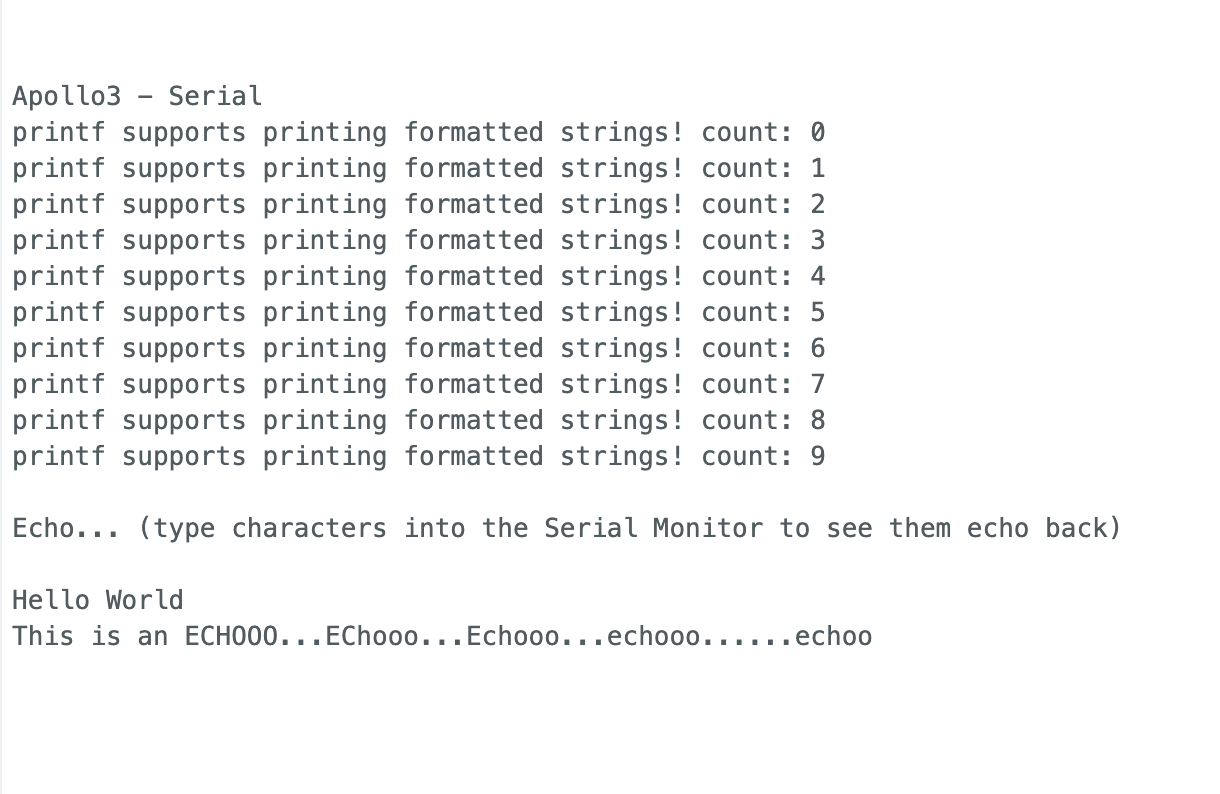
The purpose of this task was to become familiar with the boards serial interface. In Apollo3’s Example4_Serial program, the Artemis board reads input from the serial monitor in the Arduino IDE when it is available and then prints the users input back out to the serial monitor. This was useful to better understand how to read and write to the serial monitor.
To test this behavior, I sent the strings “Hello World” and “This is an ECHOOO…EChooo…Echooo…echooo……echoo” through the serial monitor, both of which the program echoed back to me.
Task 4
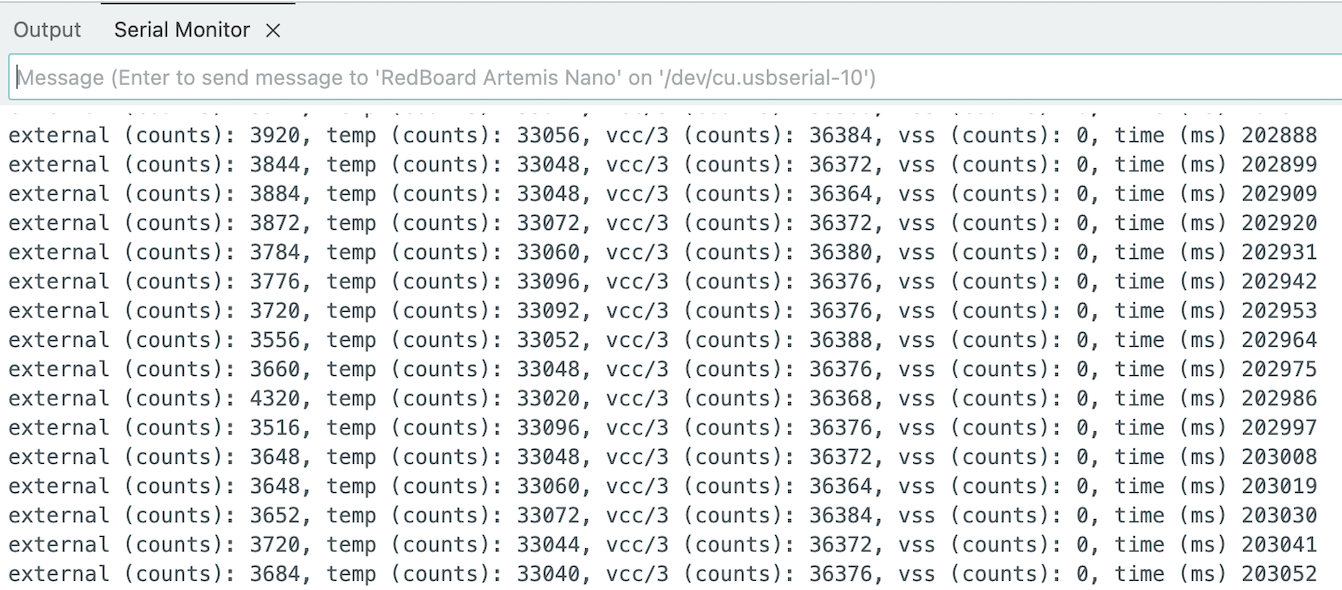
To get familiar with the capabilities of the Artemis board to handle analogue data, I uploaded the Apollo3’s Example2_analogRead code to the board. This program causes the board to read in data from its on-board temperature sensor. The original code prints this raw analog value, along with data about internal voltages and timing on the board, as shown in the code snippet and image below:
Serial.printf("temp (counts): %d, vcc/3 (counts): %d, vss (counts): %d, time (ms) %d\n", temp_raw, vcc_3, vss, millis());
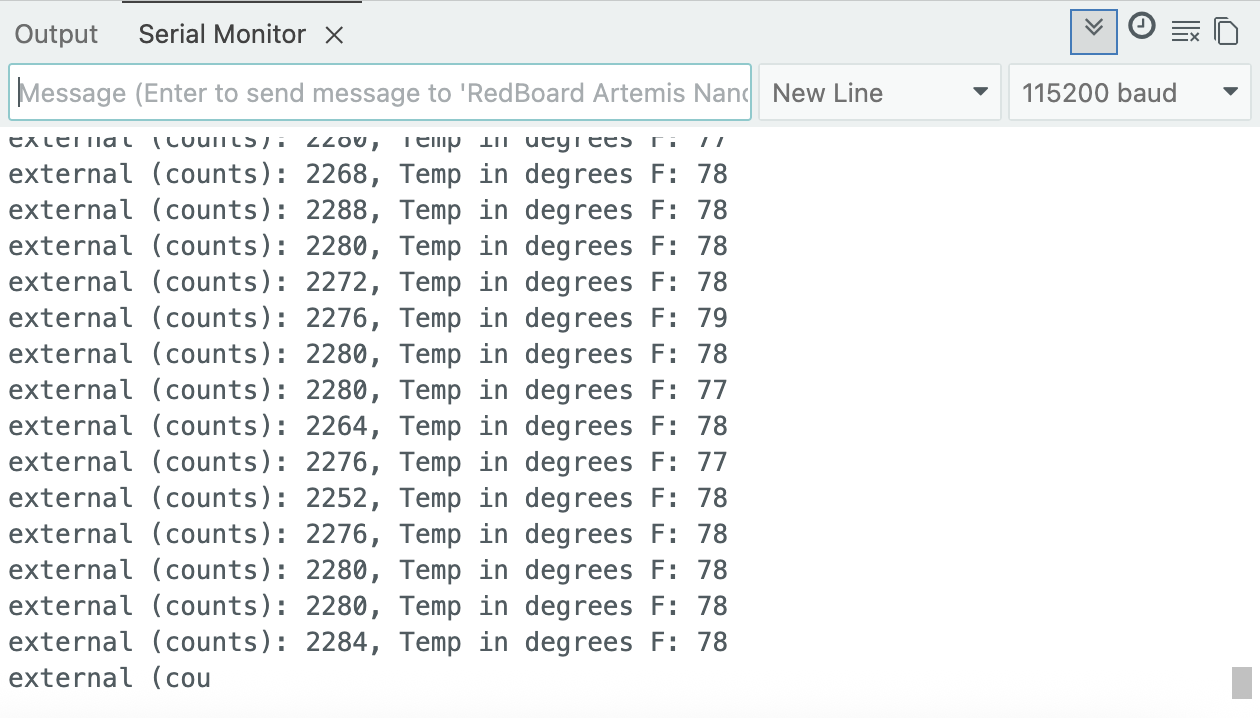
To make more sense of this data, I altered the code slightly so that it printed out the actual temperature of the internal sensor in degrees Fahrenheit as an integer.
Serial.printf("Temp in degrees F: %d\n", (int)temp_f);
Here is a video of my showing how the temperature of the board can increase by placing your fingers on it:
Task 5
Finally, I uploaded the Example1_MicrophoneOutput from the RedBoard Artemis Nano examples in order to test out the pulse density microphone (PDM) on the Artemis board. By trying to move my voice to different frequencies, I was able to change the highest recorded frequency that the PDM detected and the program printed this value to the serial monitor.
Lab 1B
Pelab
For the prelab, I updated the my version of Python, created a virtual environment to work in, and installed the necessary Python packages.
Configuration
In order to set up proper Bluetooth communication between my lapton and the board, I had to determine the MAC address of the board. as well as the UUID associated with my board, both of which are

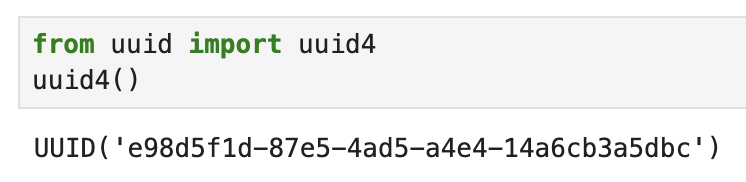
Additionally, I needed to determine the UUID associated with the board, which was done through my laptop using Jypeter Notebook.
Task 1
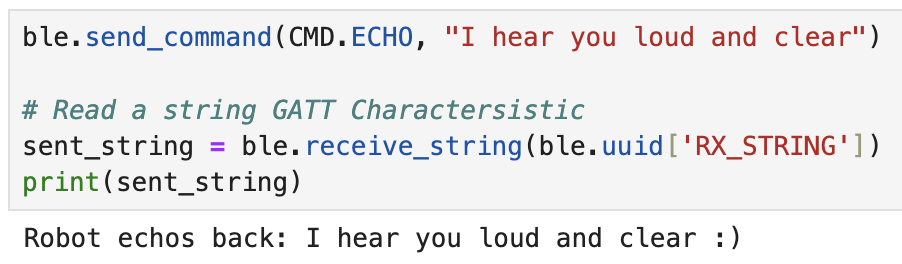
In order to send a string form my laptop to the Artemis board via a Bluetooth connection, an ECHO command needed to be implemented in the code burned onto the board. This command creates a list of char types, and then populates this list with the input from my laptop if there is input, otherwise the command does nothing. If there was an input, this input is then added to the tx_estring_value object, sandwiched between some formatting prefixes and suffixes. This is then printed to the serial monitor.
The printing of the received string is why this command is called “ECHO”.
case ECHO:
  char char_arr[MAX_MSG_SIZE];
  // Extract the next value from the command string as a character array
  success = robot_cmd.get_next_value(char_arr);
  if (!success)
    return;

  tx_estring_value.clear();
  tx_estring_value.append("Robot echos back: ");
  tx_estring_value.append(char_arr);
  tx_estring_value.append(" :)");
  tx_characteristic_string.writeValue(tx_estring_value.c_str());

  Serial.println(tx_estring_value.c_str());

  break;
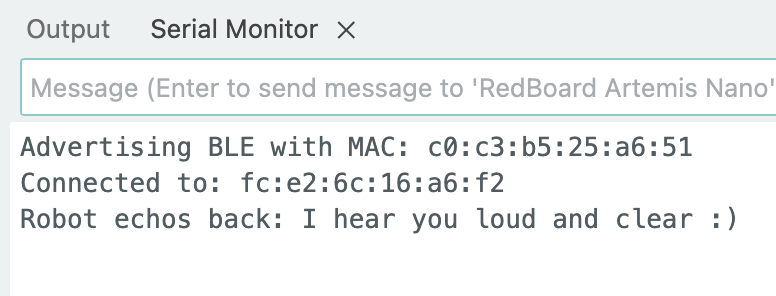
These images show what is sent and received by the Python program, and what is printed in the serial monitor. Particularly, this references the last line of the serial monitor.
Task 2
Another command that needed to be implemented was SEND_THREE_FLOATS, which would allow me to send three seperate floats from my laptop to the Artemis board. Similar to the ECHO command, it had to be ensured that the user sent the necessary amount of parameters in order to for this command to work properly. Since this command expects three seperate floats, it needed to check to see if these parameters were provided. Given that they were, the local float variables would then be assigned the values of the floats provided form the laptop, and the board printed these floats to the serial monitor.
case SEND_THREE_FLOATS:

    float flt_a, flt_b, flt_c;

    // Extract the next value from the command string as a float
    success = robot_cmd.get_next_value(flt_a);
    if (!success)
        return;

    success = robot_cmd.get_next_value(flt_b);
    if (!success)
        return;

    success = robot_cmd.get_next_value(flt_c);
    if (!success)
        return;

    Serial.print("Three Floats: ");
    Serial.print(flt_a);
    Serial.print(", ");
    Serial.print(flt_b);
    Serial.print(", ");
    Serial.println(flt_c);

    break;
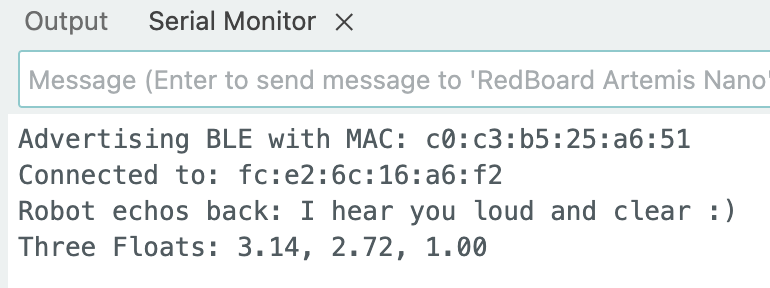
Sending ble.send_command(CMD.SEND_THREE_FLOATS, "3.14|2.718|1.00") resulted in the last line of the serial monitor shown below:
Task 3
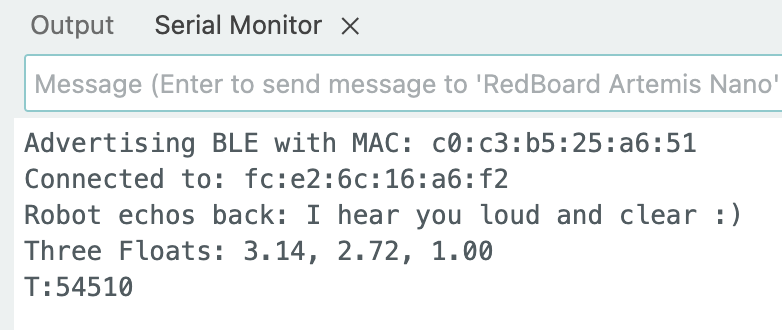
In order to keep track of the timing of the Artemis board, the GET_TIME_MILLIS command was implemented to print the current number of milliseconds since the Artemis board began running the current program to the serial monitor and also append it to the tx_estring_value object in order to send this information to my laptop.
case GET_TIME_MILLIS:

  tx_estring_value.clear();
  tx_estring_value.append("T:");
  tx_estring_value.append((int)millis());
  tx_characteristic_string.writeValue(tx_estring_value.c_str());

  Serial.println(tx_estring_value.c_str());

  break;
The T: in the above command was used so that it was clear that any data following these characters coresponds to the timing. This was used in the Python program on my laptop to use the data set to it. In the serial monitor, this data looks like the last line in this image:
Task 4
The above commands, and all other commands that prepare information to send to my laptop, are unable to send the data unless my laptop requests it. This can be cumbersome when we want data to be autonously sent from the Artemis board to the Python files, so a notification handler needed to be implemented in Python.
In the notification handler I implemented, I had the function determine if there is time data within the received data by referencing the syntax of the time data discussed in the previous task. If there is time data, it is extracted and placed in an array for use else where in the Python program. Similarly, I extract any temperature data sent to the Python program from the Artemis board.
After creating the notification function, the notification handler needs to be started and tied to this function, as shown below. This allows the Python program to retrieve data from the Artemis board whenever the board transmits data, as opposed to only receiving data when the Python program requests it.
def start_string_notifications(uuid, string_notification):
    # user should always have time data returned last in arduino
    received_string = ble.bytearray_to_string(string_notification)
    temp_index = received_string.find("Temp:")
    time_index = received_string.find("T:")
    if (time_index != -1):
        if (temp_index != -1):
            temp_array.append(received_string[temp_index+5:time_index])
        time_array.append(received_string[time_index+2:])

ble.start_notify(ble.uuid['RX_STRING'], start_string_notifications)
Task 5
As an alternative to sending a singular time stamp upon request, it could be useful for the user to receive timing information over a user-defined index of time. In order to do this, I impleneted a LOOP_OVER_SET_TIME command that returns the millis() for a user-defined amount of time. This was done by using the same logic as the GET_TIME_MILLIS, and repeating it until a user-specified amount of time has passed. The user specifies this amount of time in the Python files and sends in as part of the cocmmand.
case LOOP_OVER_SET_TIME:

    int time_length;

    robot_cmd.get_next_value(time_length);

    unsigned long loop_start_time;
    loop_start_time = millis();
    unsigned long loop_stop_time;
    loop_stop_time = loop_start_time + time_length*1000;

    while (millis() < loop_stop_time){
        tx_estring_value.clear();
        tx_estring_value.append("T:");
        tx_estring_value.append((int)millis());
        tx_characteristic_string.writeValue(tx_estring_value.c_str());

        Serial.println(tx_estring_value.c_str());
    }

    break;
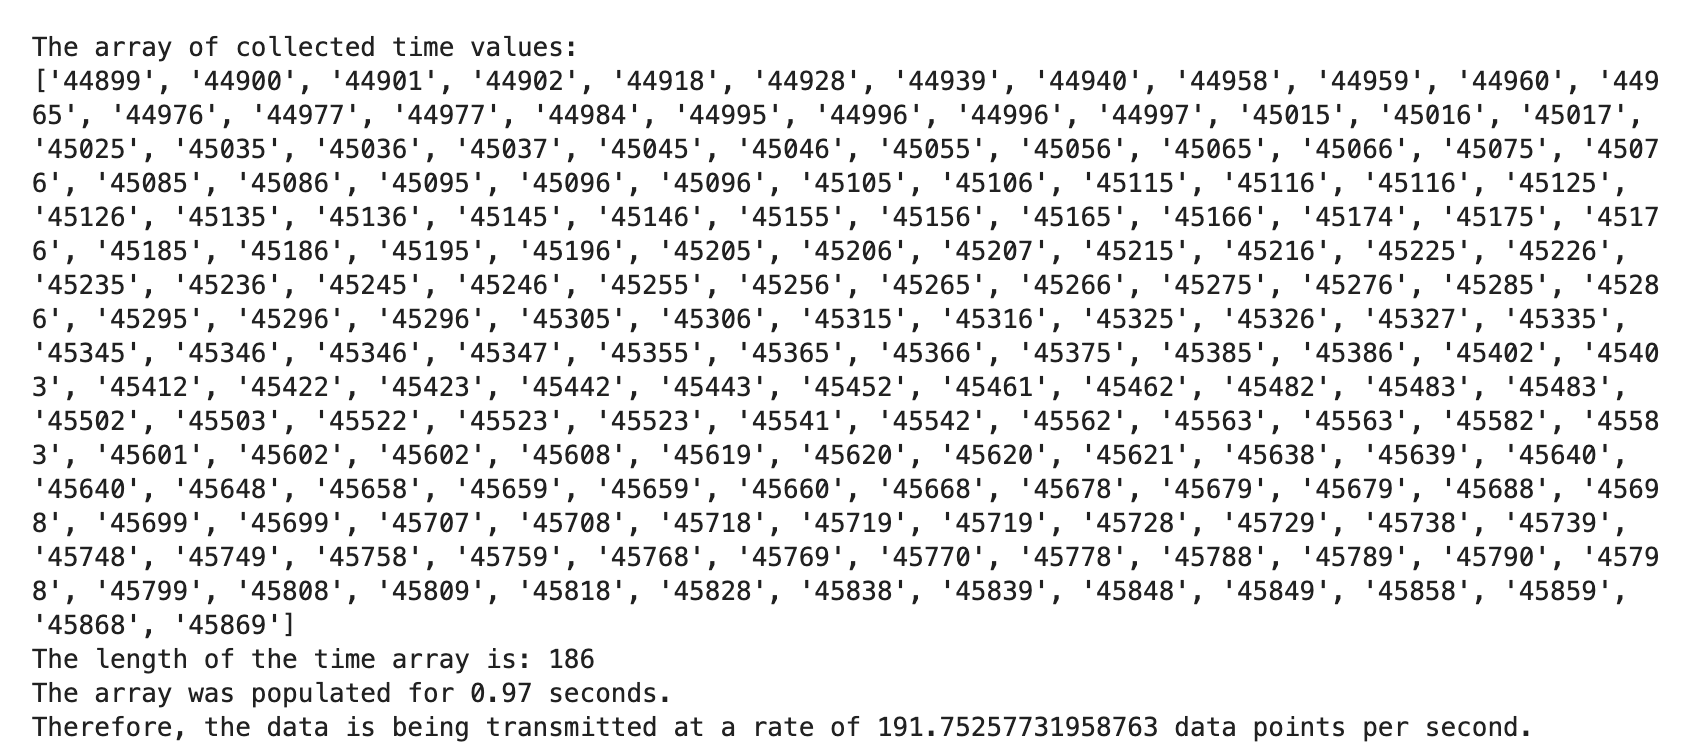
By sending this data to Python, I can then analyze how many data points are sent via Bluetooth over a certain number of time, allowing me to determing the data transfer rate. While the exact data transfer rate changes slightly between seperate calls to this command, it tends to be between 190 and 100 data points per second.
Task 6
Instead of sending singular data points at a time, it could be useful to send larger packets of data, or predefined size, at a time. In order to do this, I created a global array of integers that is then populated with time stamps in a command POPULATE_TIME_ARRAY. Additionally, this command populates a list of temperature data that is the same length as the time array. By populating both lists in the same loop iteration, it can be ensured that the temperature data corresponds with the time data.
case POPULATE_TIME_ARRAY:

    for (int i = 0; i < length_of_array; i = i + 1){
        time_array[i] = (int)millis();
        temp_array[i] = (int)getTempDegF();
    }

    break;
In order to send all of this data over to my laptop, I then implemented at SEND_TIME_DATA command. This command loops over the time array and individually sends each element in it to my laptop via Bluetooth. This is then stored in a list of time data in Python.
case SEND_TIME_DATA:

    for (int i = 0; i < length_of_array; i = i + 1){
        tx_estring_value.clear();
        tx_estring_value.append("T:");
        tx_estring_value.append(time_array[i]);
        tx_characteristic_string.writeValue(tx_estring_value.c_str());

        Serial.println(tx_estring_value.c_str());
    }

    break;
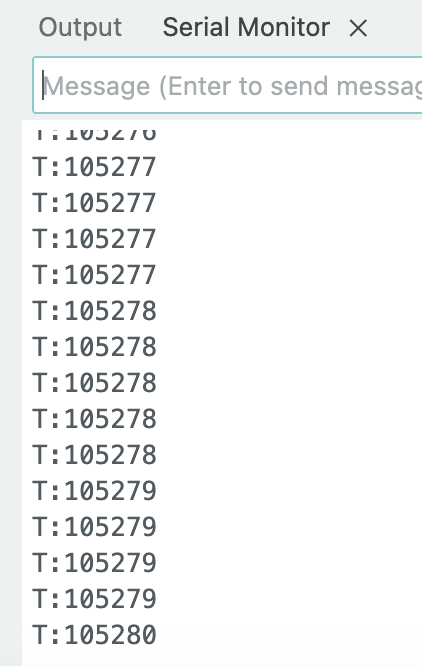
In the serial monitor, the data looks like this:
The Python program interprets this data, removing the T: from the time stamp and placing each data point into the array that holds time data.
Task 7
As discussed above, the program is now capable of storing time data and temperature data from the same time stamp in their respective arrays. Next, the GET_TEMP_READINGS command needs to be implemented in order to send both the time data and the temperature data back to the laptop in chunks, as opposed to the Artemis continuously transmitting data. This is very similar to the SEND_TIME_DATA command.
case GET_TEMP_READINGS:

    for (int i = 0; i < length_of_array; i = i + 1){
        tx_estring_value.clear();
        tx_estring_value.append("Temp:");
        tx_estring_value.append(temp_array[i]);
        tx_estring_value.append("T:");
        tx_estring_value.append(time_array[i]);
        tx_characteristic_string.writeValue(tx_estring_value.c_str());

        Serial.println(tx_estring_value.c_str());
    }

    break;
This command then sends whatever data was in the time and temperature arrays at the time of the call to the command. The notification handler is able to parse this data by looking for the T: and Temp: prefixes of the data, as shown in Task 4. The Python program then seperates the data and places them into their respective arrays in the Python program without their prefixes.
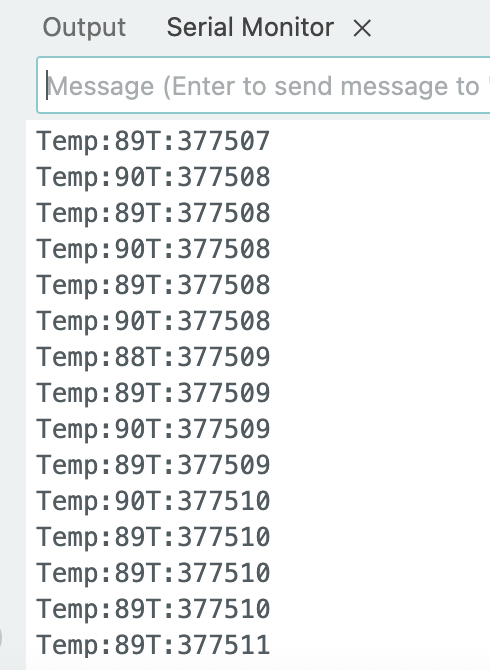
The Python program interprets this data, searching for the T: and Temp: prefixes in order to find their corresponding data points and place them in seperate arrays.
Task 8
These two methods of data transfer, one continuous stream of data and bursts of large amounts of data, have different consequences. The continous transmission of data from the Artemis board is helpful for real time systems that require a constant feed of information about the state of the system, but it is also very slow compared to sending packets of data. While the second method is faster, the amount of time inbetween packets being sent could potentially be long. If the system in question is dynamic enough, it’s possible that important information won’t be able to get to the Python program fast enough in order to use that data appropriately.
Therefore, for systems that don’t change very quickly or that don’t need continous data input, then sending data in packets is better. However, if the system can change quickly or if continuous information is needed, then sending singular segments of data immediately after each other with no pause is better.
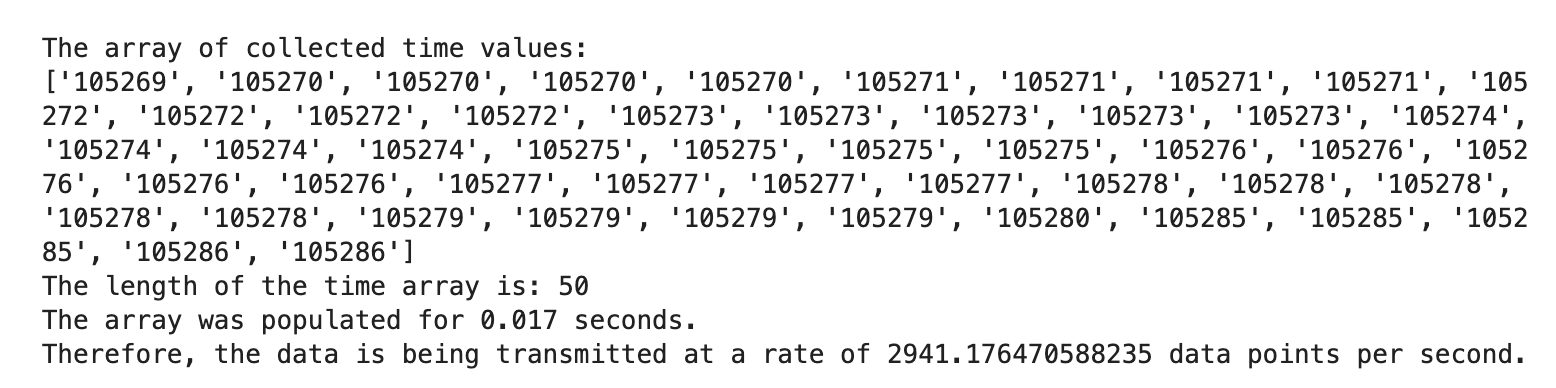
It is important to try to understand how quickly the packet sending method of data transmission can actually record data. For this, we can look at the amount of data in the packets and compare it to the amount of time to create the packet.
The amount of space that the second method of data transfer takes up in RAM is also important to keep in mind. With 384 kB of RAM, a simple array of 4-byte integers used for keeping time can be more than 90,000 integers long without worrying about memory loss. However, this isn’t realisting, and in an actual system more than just time data would most likely be needed. It’s entirely possible that some systems might use many sensors, all of which would require their own arrays to store their data, shortening the maximum allowable length of these arrays. This relationship would become even more complicated if the arrays stored complex objects. In general, the following relationship must hold:
If: S = the number of bytes necessary to hold only a single element in every data array present in the the program
And: n = length of every array in the program
Then: (S*n) for all types of arrays must be less than 394,000
Or more succinctly:
n < (394,000)/S
Discussion
In this lab, I was able to establish a Bluetooth connection between my laptop and the Artemis board, send data to and from both devices, and implement a notification handler in Python in order to automatically recieve transmitted data from the Artemis board. I was also able to analyze the efficiency of continuously transmitting data from the Artemis and compare it with sending arrays of data at non-continuous intervals of time.
Acknowledgements
For aide in some of the formatting of this webpage, particularly with the images and videos, I consulted Chat GPT for advice on how to use Markdown correctly.